 Winter Roof Checklist: Essential Pre-Storm Inspections Before the Weather Hits
The winter storm season has already begun, but it typically gets worse during the early part of the new year. Your roof has a hard job to protect you, through the storms and freezing weather, and it has to be in the best possible shape if it’s going to succeed.
High winds, heavy rain, freezing nights and snowfall can all damage your roof, so it’s vital that you make sure it’s in good condition to protect you. So here’s your winter roof checklist.
1. Inspect Your Roofing Materials
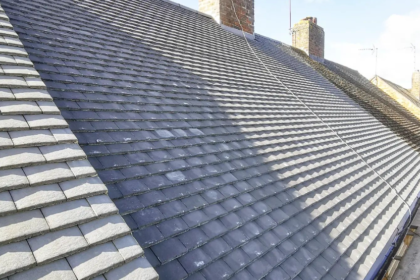
The most common reason for leaks during winter storms is damage to your roofing materials. This can be broken or missing tiles or slats, or else tears in a felt covering. Any of these will allow water to seep into your roofspace, potentially causing serious damage.
Ideally, this should be inspected up close, from the top of a ladder, either by yourself or by a professional roofer. A quick alternative, though, is to look from street level through binoculars.
2. Look for Sagging or Dips
At the same time as you’re inspecting the roofing materials, you should also look out for any dips or sagging in the roof. These can be caused by extra weight from pooling water, snow or debris blown onto the roof, and the external signs may be a symptom of serious structural damage.
3. Check Seals and Flashings
Any structures protruding from the roof, such as chimneys, dormers or skylights, will be sealed by flashing, often of lead. Unfortunately, this can lift or warp over time, allowing water to get into the roofspace. Make sure all seals and flashings are in good repair.
4. Clear Gutters and Downpipes
Your gutters and downpipes are responsible for allowing water to run off the roof and straight into the drains. During the autumn in particular, though, they can get clogged up with leaves and debris, which can cause pooling on the roof and damage to the walls and foundations.
You need to make sure your gutters are cleaned out and your downpipes are unblocked, before the winter storms set in. This will allow them to continue protecting your home.
5. Inspect Fascias and Soffits
Your fascias and soffits seal the eaves of your roof, as well as helping to ventilate your roofspace. However, they can suffer over time from rot or insect infestation — especially if they’re wooden. If you find damage or loose boards, these need to be repaired at once. Or, ideally, replaced by more resilient uPVC boards.
6. Check Your Loft
Make sure your loft insulation is adequate and in good repair to prevent heat loss. At the same time, check the vents to ensure good circulation of air to prevent damp and mould developing.
While you’re in the loft, you can also make an additional check for roof damage. Switch off all artificial lighting, and if any pricks of light show through, that’s a sure sign of a hole in your roofing materials.
7. Manage Your Trees
We all love trees, but unfortunately, they don’t belong too close to your house. If branches overhang, they can damage your roofing material or clog your gutters. Make sure they’re cut back to where you can enjoy your trees safely.
8. Be Prepared
You don’t have to be a Boy Scout to be prepared. Bad weather can hit quickly during the winter, so make sure you have everything ready that you might need in an emergency: waterproof tarpaulin, roof repair tape and a torch. Not to mention, of course, contact details for a roofing repair service somewhere easy to find.
It’s a long list, but there’s a very easy way to get through it all — schedule a professional roofer to make regular inspections. You’ll not only get an expert assessment, but the work is likely to be done much more promptly.
Give Empire a call to find out how we can help your roof weather the winter storms.